Important Note: This video focuses on the MT-1501 model. However, the process for CHT models is similar.
Setting your embroidery parameters means identifying the area you want to embroider on. This is important because without set parameters, your machine can mistakenly embroider outside the hoop which can lead to needle breaks. Another important aspect of setting parameters is to ensure your design will properly stitch in the desired area of your fabric or garment.
Please follow the instructions listed below to resolve your issue.
Simple adjustment:
1. Go to your control panel.
2. Click on the 'Hoop selection' tab.
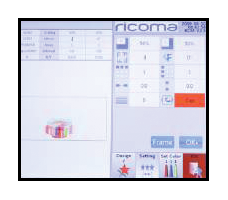
3. Click the 'Frame' button.
4. Find the cap Y-axis size number and select it.
5. Delete the number.
6. Input number 85.
7. Press 'OK' button to save.
See below for more information.
If you still have questions on how to adjust parameters...
Watch our tutorial videos:
Cap Embroidery Tips and Best Practices
Read our blog article:
Need additional help?
Please don’t hesitate to contact us for further assistance at service@ricoma.com or visit our support page at www.ricoma.com/US/support.